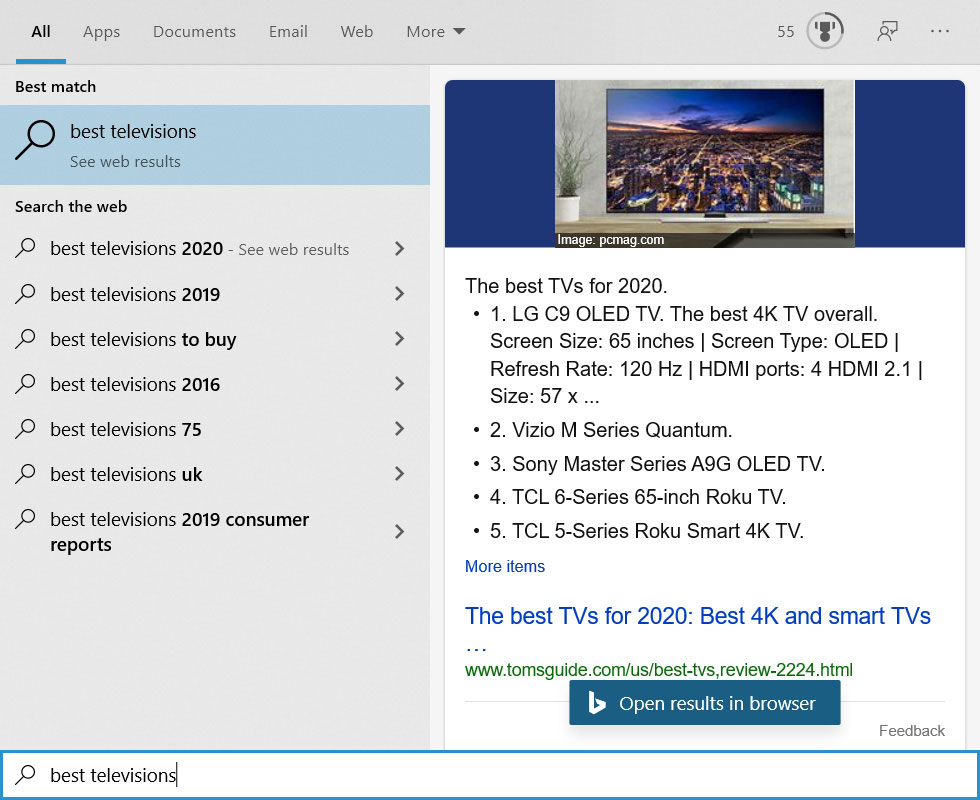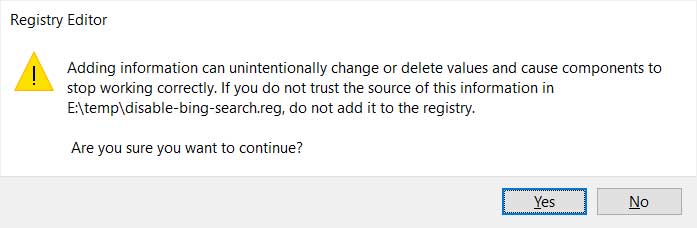


The web is made up of terrific content from all over the world and sometimes the content you want to read is written in a different language. Thankfully, Google Chrome has built-in support for the Google Translate service, which will automatically translate the page into a language of your choice.
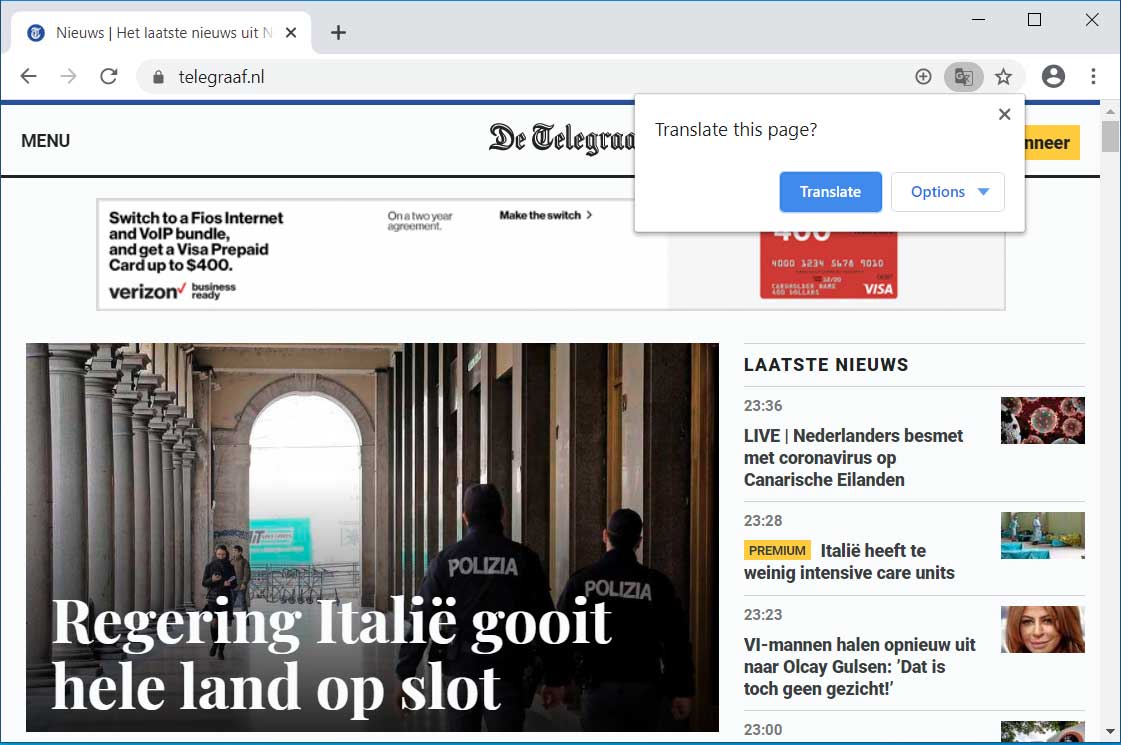
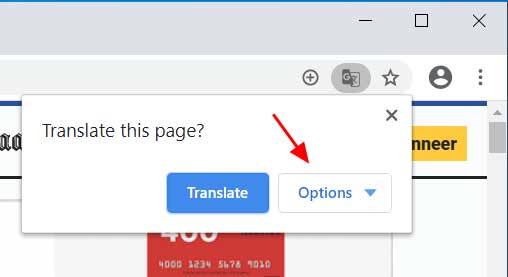
If you visit a website with Google Chrome and it is written in a different language, the browser will automatically display a prompt asking if you wish to translate the page into your default language as shown below.
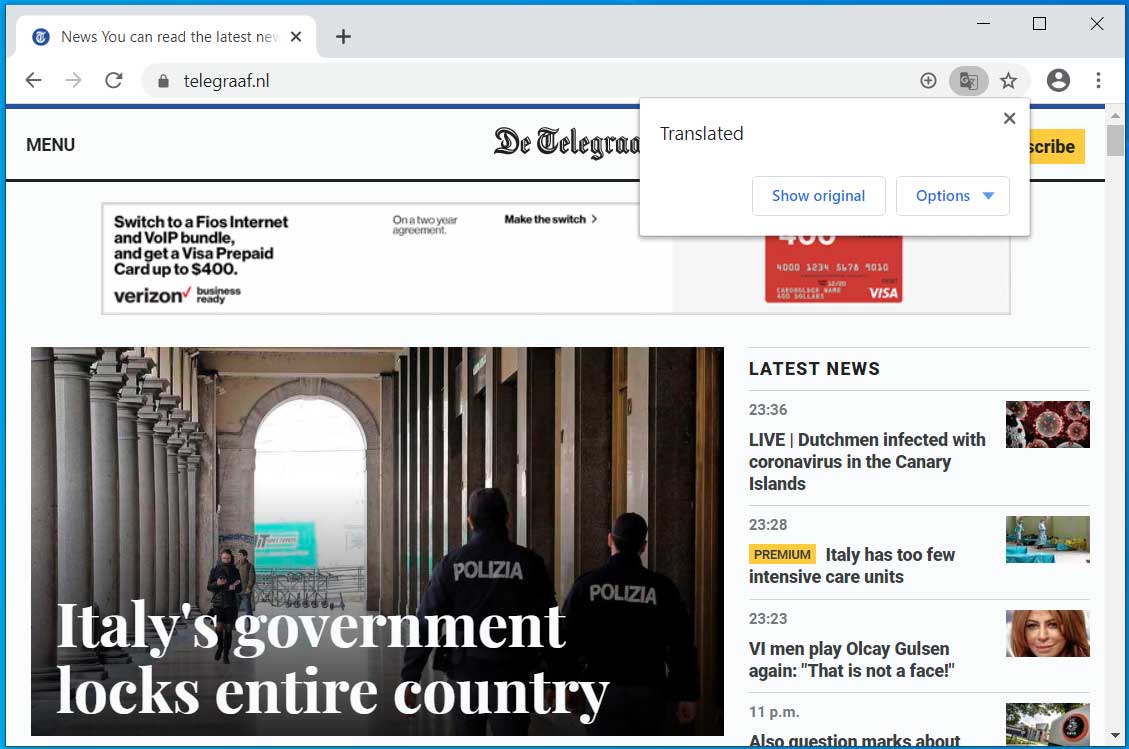
If you click on the Translate button, Google will send the URL to the Google Translate service, which will cause the page's contents to be translated to your default language. This can be shown in the site below, which has been translated from Dutch to English.
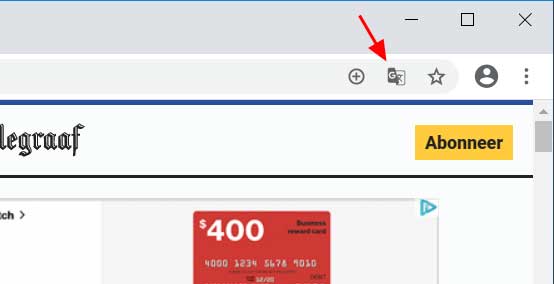
If the Translate prompt does not appear when visiting a foreign site, you can cause it to display by clicking on the ![]() button in the Chrome address bar as shown below.
button in the Chrome address bar as shown below.
Selecting the language you wish to translate to
By default, Google Chrome will translate a web page to the default language configured in your operating system.
If you wish to translate a page to a different language or Google Chrome is having trouble detecting the correct language of the page, you can select what language you want to translate from and to by going into the Translate options.
This page can be accessed by clicking on the Options button in the 'Translate this page' dialog as shown below.
When you click on the Options button, you should then select Change languages to be brought to a page where you can select the language of the page and what you would like to translate it to.
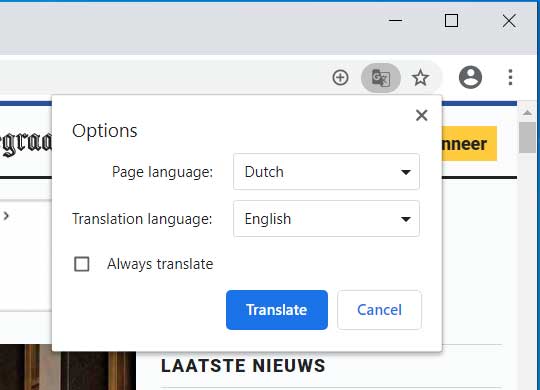
When ready, click on the Translate button and the page will be translated from and to the configured languages.
from Computer Tutorials and How-Tos
The web is made up of terrific content from all over the world and sometimes the content you want to read is written in a different language. Thankfully, Google Chrome has built-in support for the Google Translate service, which will automatically translate the page into a language of your choice.
If you visit a website with Google Chrome and it is written in a different language, the browser will automatically display a prompt asking if you wish to translate the page into your default language as shown below.
If you click on the Translate button, Google will send the URL to the Google Translate service, which will cause the page's contents to be translated to your default language. This can be shown in the site below, which has been translated from Dutch to English.
If the Translate prompt does not appear when visiting a foreign site, you can cause it to display by clicking on the ![]() button in the Chrome address bar as shown below.
button in the Chrome address bar as shown below.
Selecting the language you wish to translate to
By default, Google Chrome will translate a web page to the default language configured in your operating system.
If you wish to translate a page to a different language or Google Chrome is having trouble detecting the correct language of the page, you can select what language you want to translate from and to by going into the Translate options.
This page can be accessed by clicking on the Options button in the 'Translate this page' dialog as shown below.
When you click on the Options button, you should then select Change languages to be brought to a page where you can select the language of the page and what you would like to translate it to.
When ready, click on the Translate button and the page will be translated from and to the configured languages.
https://ift.tt/2Q3aqzE