


With the release of the Windows 10 May 2019 Update, Microsoft introduced a new security feature called Tamper Protection that protects security settings for Windows Defender antivirus from being disabled by malware or third-party programs.
When enabled, Tamper Protection will only allow Windows Defender related settings to be changed when done through the Windows Security settings screen. If a program, such as malware, or even PowerShell tries to change security settings or Microsoft Defender preferences, Tamper Protection will block the settings from being modified.
Due to this, Tamper Protection is an integral part of the Windows 10 security environment and should be enabled by all users for increased security and protection from malicious programs.
How to enable Tamper Protection in Windows 10
To enable Tamper Protect in Windows 10, please perform the following steps:
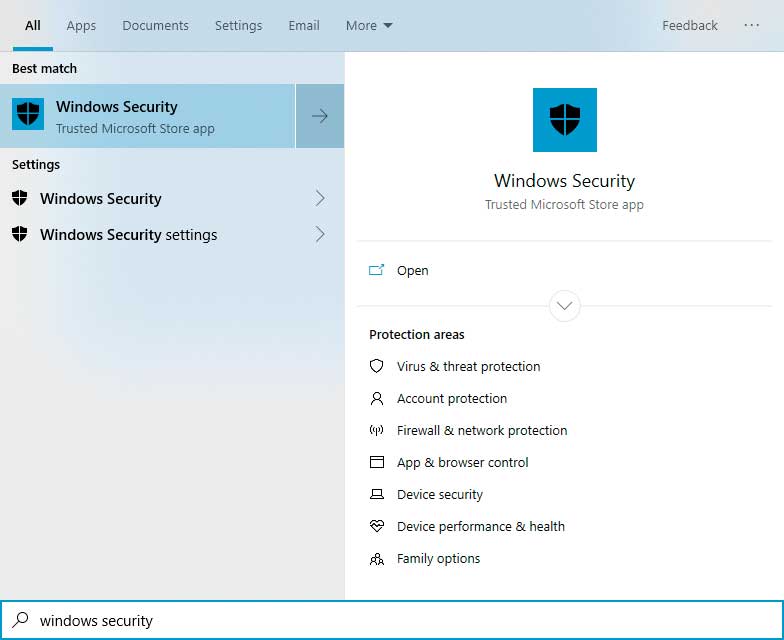
- From the Windows Start Menu, search for and click on Windows Security when it shows in the search results.
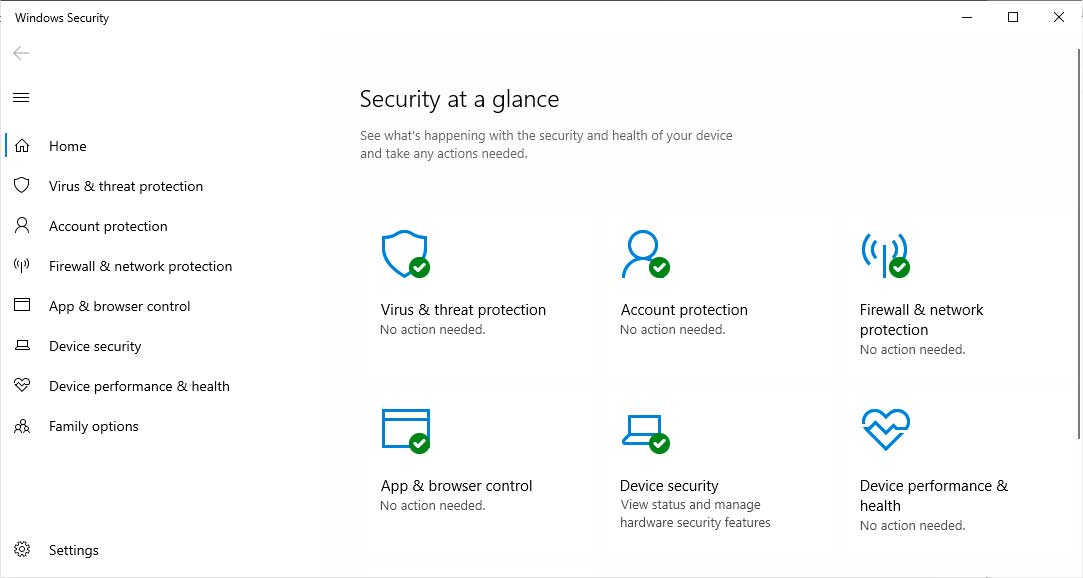
- When Windows Security opens, click on Virus & threat protection.
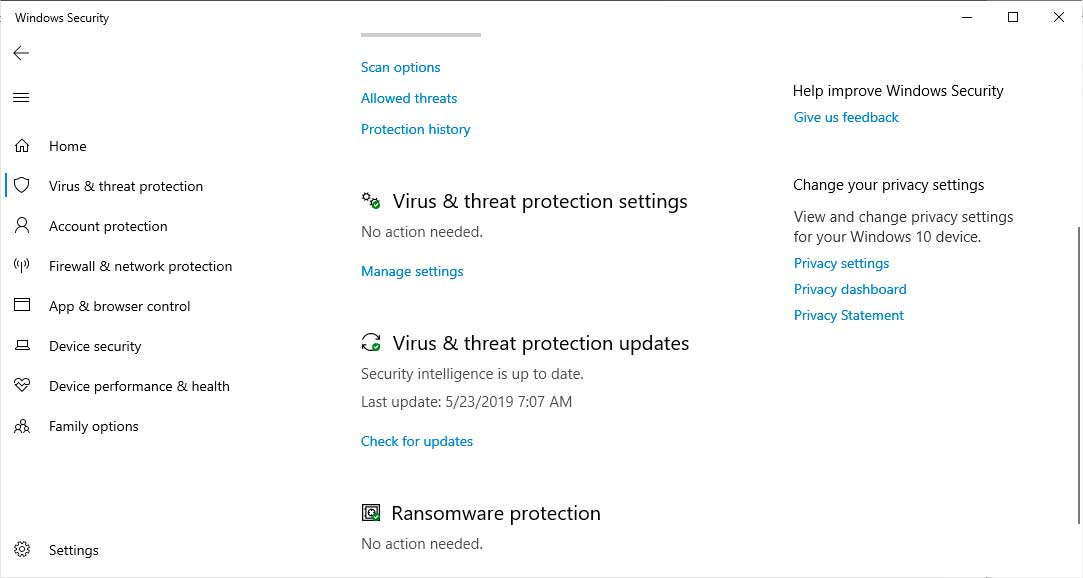
- At the Virus & threat protection screen, scroll down until you see Virus & threat protection settings and then click on Manage settings.
- Scroll down until you see Tamper Protect and click on the toggle switch so it becomes enabled.
- You can now close the Windows Security window.
With Tamper Protection now enabled, your Windows Defender settings will be secured from malicious changes.
Enabling Tamper Protection with other antivirus software
If you have non-Microsoft antivirus software installed, Microsoft will register it as your antivirus provider and disable Windows Defender. This also means that Tamper Protection and other features will be disabled as well.
If you want to enable Tamper Protection while having a third-party antivirus software installed, you can follow these steps:
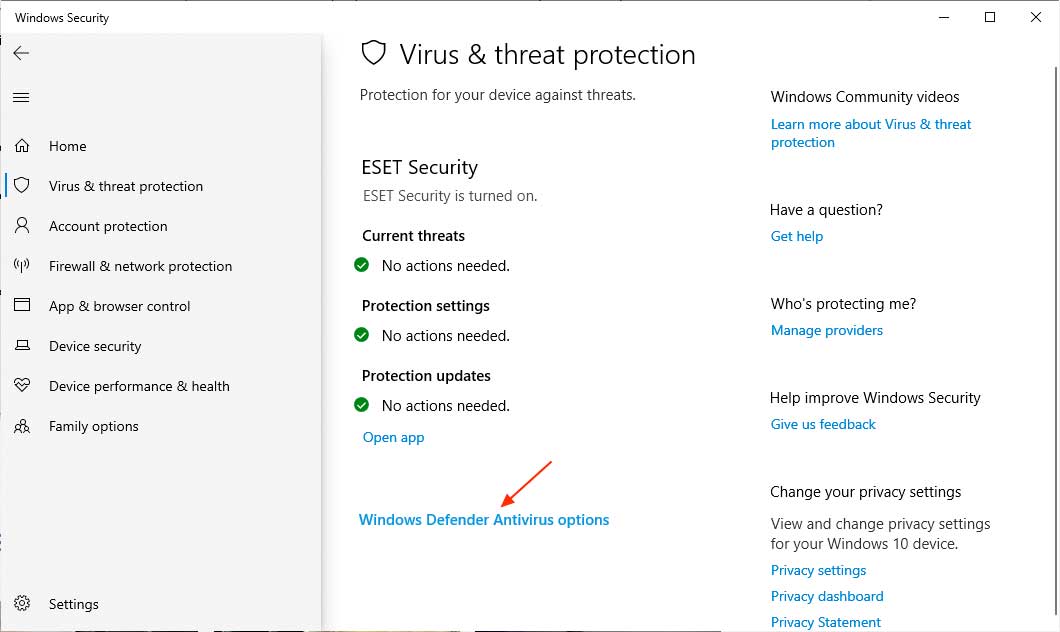
- Go into the Virus & threat protection settings as described above. When you open the screen, it will show you the antivirus software you are using, which in my case is ESET. Now click on the Windows Defender Antivirus options as shown below.
- This will display a toggle asking if you would like to enable periodic scanning with Windows Defender antivirus. Enable this setting and you will now have access to the rest of the Windows Security settings, including Tamper Protection.
- Now continue with step 3 in the previous section to finish enabling Tamper Protection.
from Computer Tutorials and How-Tos
With the release of the Windows 10 May 2019 Update, Microsoft introduced a new security feature called Tamper Protection that protects security settings for Windows Defender antivirus from being disabled by malware or third-party programs.
When enabled, Tamper Protection will only allow Windows Defender related settings to be changed when done through the Windows Security settings screen. If a program, such as malware, or even PowerShell tries to change security settings or Microsoft Defender preferences, Tamper Protection will block the settings from being modified.
Due to this, Tamper Protection is an integral part of the Windows 10 security environment and should be enabled by all users for increased security and protection from malicious programs.
How to enable Tamper Protection in Windows 10
To enable Tamper Protect in Windows 10, please perform the following steps:
- From the Windows Start Menu, search for and click on Windows Security when it shows in the search results.
- When Windows Security opens, click on Virus & threat protection.
- At the Virus & threat protection screen, scroll down until you see Virus & threat protection settings and then click on Manage settings.
- Scroll down until you see Tamper Protect and click on the toggle switch so it becomes enabled.
- You can now close the Windows Security window.
With Tamper Protection now enabled, your Windows Defender settings will be secured from malicious changes.
Enabling Tamper Protection with other antivirus software
If you have non-Microsoft antivirus software installed, Microsoft will register it as your antivirus provider and disable Windows Defender. This also means that Tamper Protection and other features will be disabled as well.
If you want to enable Tamper Protection while having a third-party antivirus software installed, you can follow these steps:
- Go into the Virus & threat protection settings as described above. When you open the screen, it will show you the antivirus software you are using, which in my case is ESET. Now click on the Windows Defender Antivirus options as shown below.
- This will display a toggle asking if you would like to enable periodic scanning with Windows Defender antivirus. Enable this setting and you will now have access to the rest of the Windows Security settings, including Tamper Protection.
- Now continue with step 3 in the previous section to finish enabling Tamper Protection.
No comments:
Post a Comment