By default, the Windows 10 Start menu will open up in a size that accommodates all of the pinned items. For those who wish to use a larger Start screen, making the Start menu open in a full-screen mode is possible.
When the full-screen mode is enabled, the Start screen will overlay the entire desktop and provide a more generous amount of space to pin applications, and your live tiles will be larger.
If you wish to enable the Start full-screen mode, please follow these steps:
- Click on the Start menu and then click on the Settings cog (
 ) to open the Windows 10 Settings.
 - When the Settings open, click on Personalization and then Start.
- In the Start settings, look for a setting named 'Use Start full screen' and click on the toggle to enable the feature, as shown below.

Enable Start full screen - You can now close the Start settings screen.
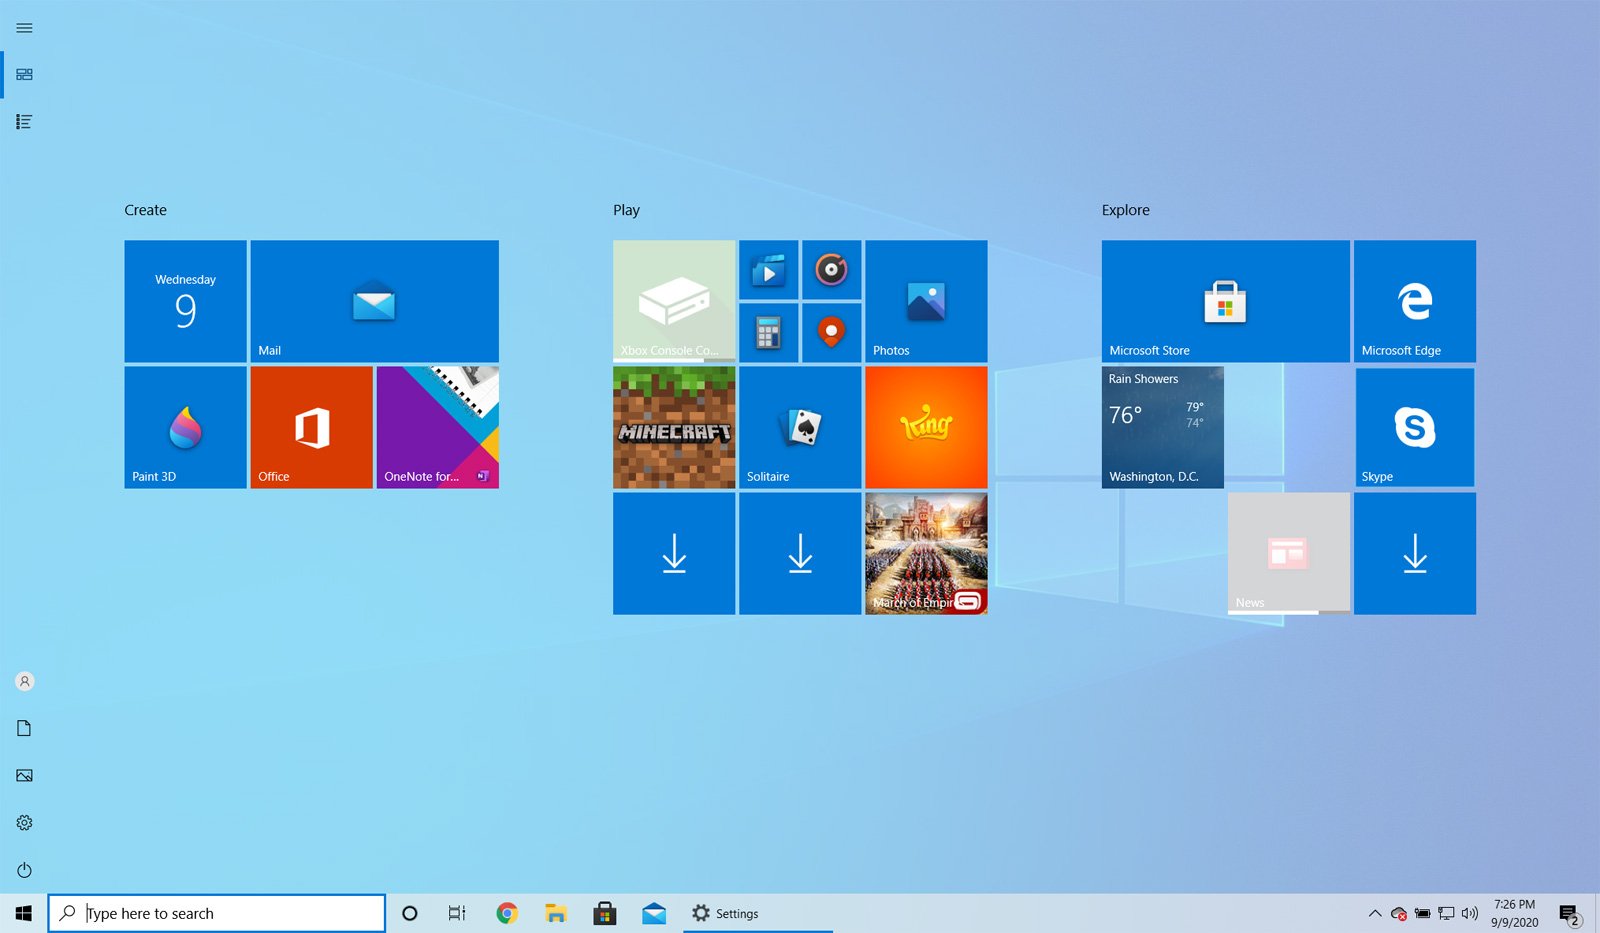
Now that you have enabled Start full screen mode, when you click on the Start button, the Start menu will be shown in full screen and overlay the entire desktop.
When using Start in full screen mode, you can close the Start menu at any time by pressing the Escape key on your keyboard or by clicking on another program or screen.
To disable Start full screen mode, just follow these steps again, but this time disable the 'Use Start full screen' setting.
from Computer Tutorials and How-Tos
By default, the Windows 10 Start menu will open up in a size that accommodates all of the pinned items. For those who wish to use a larger Start screen, making the Start menu open in a full-screen mode is possible.
When the full-screen mode is enabled, the Start screen will overlay the entire desktop and provide a more generous amount of space to pin applications, and your live tiles will be larger.
If you wish to enable the Start full-screen mode, please follow these steps:
- Click on the Start menu and then click on the Settings cog ( ) to open the Windows 10 Settings.
- When the Settings open, click on Personalization and then Start.
- In the Start settings, look for a setting named 'Use Start full screen' and click on the toggle to enable the feature, as shown below.
Enable Start full screen - You can now close the Start settings screen.
Now that you have enabled Start full screen mode, when you click on the Start button, the Start menu will be shown in full screen and overlay the entire desktop.
When using Start in full screen mode, you can close the Start menu at any time by pressing the Escape key on your keyboard or by clicking on another program or screen.
To disable Start full screen mode, just follow these steps again, but this time disable the 'Use Start full screen' setting.
https://ift.tt/3is3vfu